Upload files to a location
Add your own images, CAD drawings, point clouds (XYZ, E57 and RCS on the Scan tab), Revit models, PDF reports and virtual tour links to a location you manage, and find them afterwards.
Your locations can hold more than IPX deliverables. Upload your own images, CAD drawings, point clouds, Revit models and PDF reports, or link a virtual tour, and each one lands in its tab of the location, next to the rest of your building data.
Before you start
- You need manage access to the location. Without it the upload buttons stay visible but disabled. Ask your team admin for access.
- You can upload several files at once.
Uploading files
Open the uploader
Open the location, then click the add button on the tab you want, for example Add Scan on the Scan tab or Add Image on Images. An empty tab shows the same button in the middle. The sidebar's New menu also has Upload Files.
Confirm the location
The Upload Assets window opens on Select Location with your current location picked. Use Search locations... to upload somewhere else.
Choose the asset type
Under Asset Type, pick what you're uploading: Images, CAD Files, Scans, 3D Models, Reports or Virtual Tour. Each card lists the formats it takes. Scans takes XYZ, E57 and RCS. CAD Files asks whether the drawing is a Floor Plan or a Reflected Ceiling Plan.
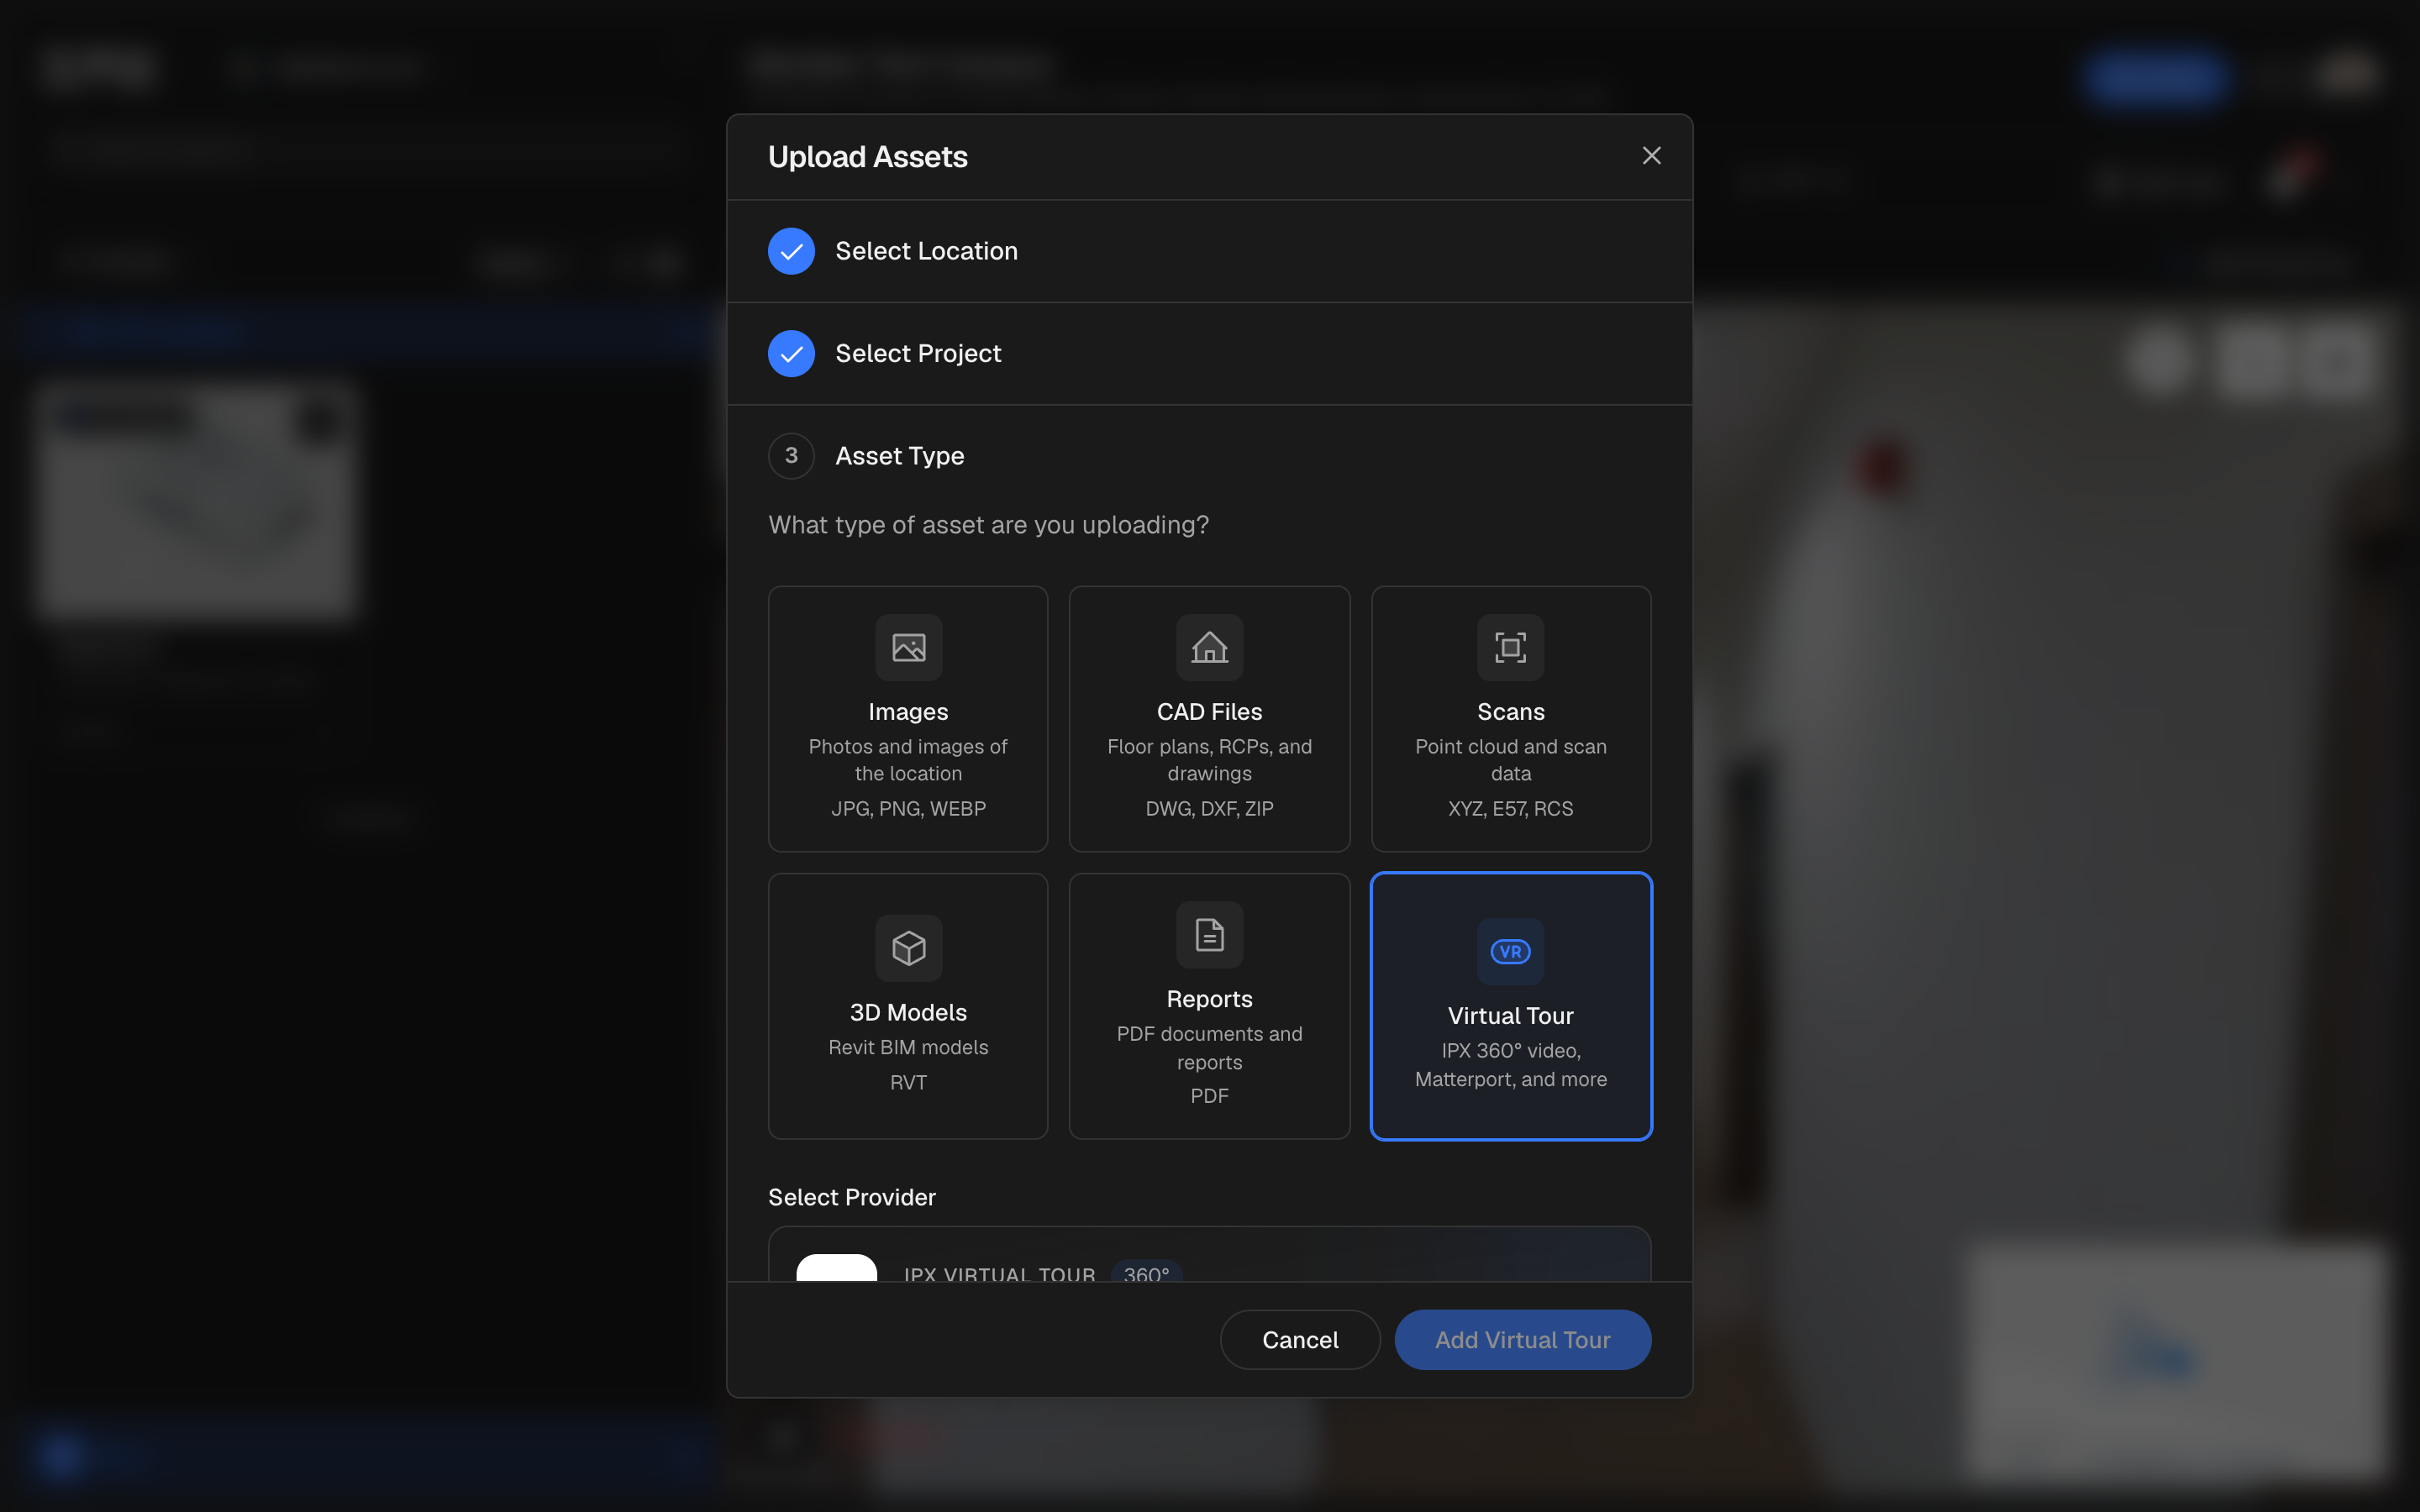
Assign building levels
Under Select Levels, pick the levels these files belong to. For images, an optional Add Labels step follows.
Add your files
Under Upload Files, drag files onto the drop area or click it to browse. Each file shows its own progress. If some fail, click the Retry button (for example Retry 2 failed uploads) rather than starting again.
If a large upload stops
If your connection drops while a large file is uploading, the upload pauses and carries on by itself once you're back online.
If the upload stops for another reason, for example the page was refreshed or the tab closed, the file shows Upload stopped. Add the same file again to resume where it left off. Upload the same file again to the same location as the same asset type. It picks up from the parts already sent, and its progress reads Resuming with how much of the file is already uploaded.
Supported formats
| Asset type | Formats | Where it appears |
|---|---|---|
| Images | JPG, PNG, WEBP | Images tab |
| CAD Files | DWG, DXF, ZIP | CAD tab |
| Scans (point clouds) | XYZ, E57, RCS | Scan tab |
| 3D Models (BIM) | RVT | BIM tab |
| Reports | PDF tab | |
| Virtual Tour | Share link (no file) | Images tab, Virtual Tours |
RCS is accepted on the Scan tab. An Autodesk ReCap .rcs file uploads to the Scan tab like an E57 or XYZ, so you can keep it with the rest of the location.
The Scan tab takes RCS, but a BIMIT order reads a point cloud only as .e57, .xyz, .las or .laz. A ZIP is not accepted. If you only have the RCS, export it as E57 (for example from Autodesk ReCap) and use that file when you order. See Request BIMIT.
Can't find a file you uploaded?
- Check the organization. Files belong to a location, and a location to one organization. If you belong to more than one, click the organization name at the top of the left sidebar and switch. See Search locations and switch organizations.
- Check the location and the tab. Open the location you uploaded to and the tab for that asset type: a point cloud is on the Scan tab, not on Activity.
- Still missing? Ask in the chat and we will pass you to a person, with the file name, the location and roughly when you uploaded it.
While files are uploading the window stays open. Let the upload finish before you leave the page.
If you close the Upload Assets window during an upload and confirm, the upload is cancelled rather than paused, and the file can't be resumed. Upload it again from the start.