The quality of your virtual tour is decided before you ever open IPX — it's decided while you film. A steady, well-lit walkthrough maps cleanly into a tour and a usable 3D reconstruction; a rushed one fights the pipeline at every stage. Ten minutes of care on site saves a re-shoot later.
The one-line version
Walk slowly and keep moving, hold the camera high and level, light the space, pass glass and mirrors at an angle rather than head-on — and finish standing where you started. Everything below is detail on those rules.
Why it's worth the care
A careful 360° walk is closer to a laser scan than most people expect. In our testing, a single continuous handheld walkthrough of a building reconstructed to within about 10 cm of a survey-grade LiDAR scan of the same space, with overall scale accurate to better than 0.1%. That result only holds when the footage is steady, well-lit, and complete — which is what this guide is about.
The golden rule: close the loop
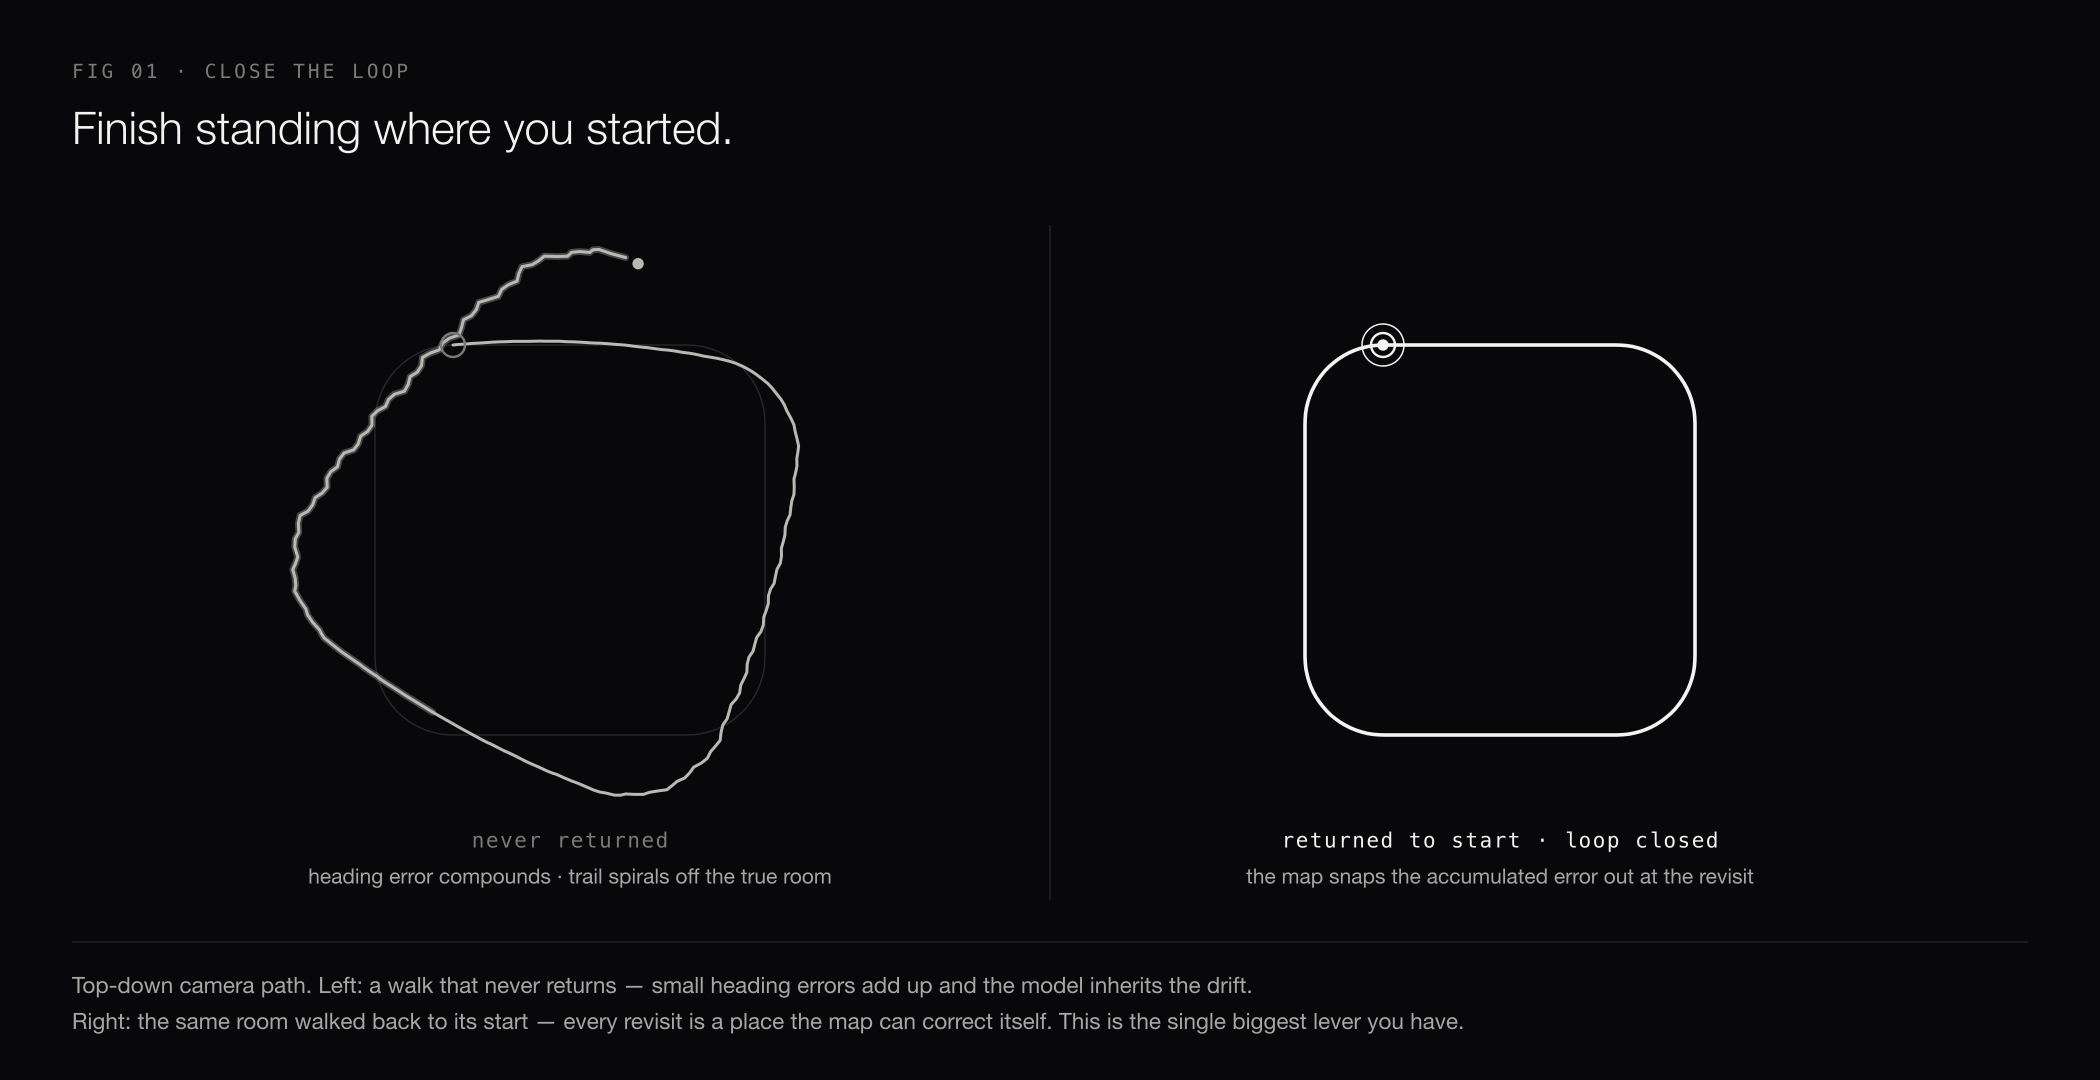
Finish the walk standing where you started, ideally coming back through the same doorway or corridor you began in. As you walk, the camera's position is estimated step by step, and small heading errors add up. When you return to a place you've already been, the map recognises it and snaps that accumulated error out. A walk that never returns keeps its drift — and the model inherits it.
Camera and setup
- Use a 360 camera that exports equirectangular video (the standard 2:1 format) — Insta360, x5 version ideally.
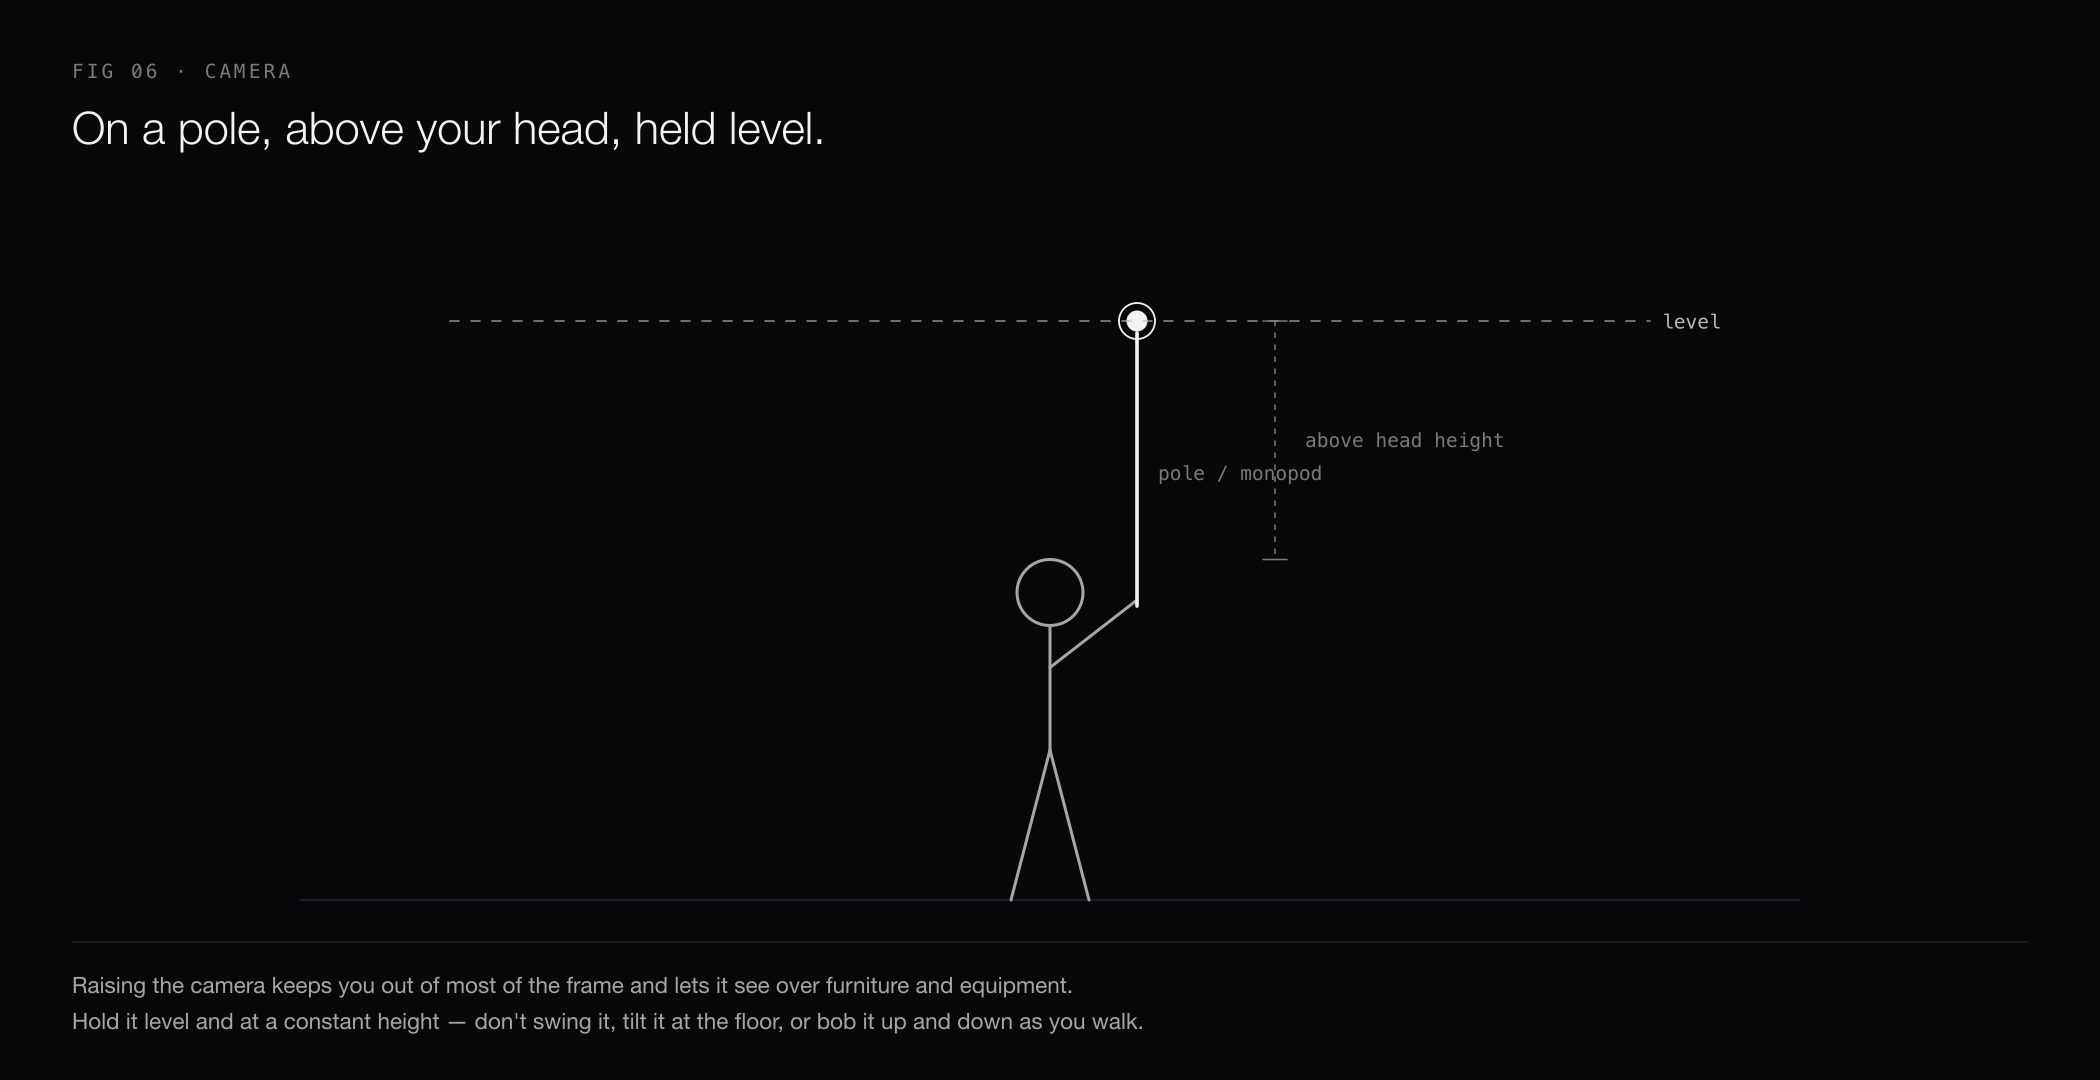
- Mount the camera on a pole or monopod held above head height. This keeps you out of most of the frame and gives the mapping a clear view over furniture and equipment.
- Clean both lenses before you start. Smudges blur the exact imagery the reconstruction depends on.
- Export at the highest resolution your camera offers, as mp4, mov, or insv.
- Hand over the stitched 360° (the single 2:1 equirectangular video) — not a flat "reframed" clip aimed in one direction. If your camera's app lets you choose a stitching quality, pick the optical-flow / best option; it lines the two lenses up far more cleanly, and clean stitching is what lets the walkthrough track.
How to move
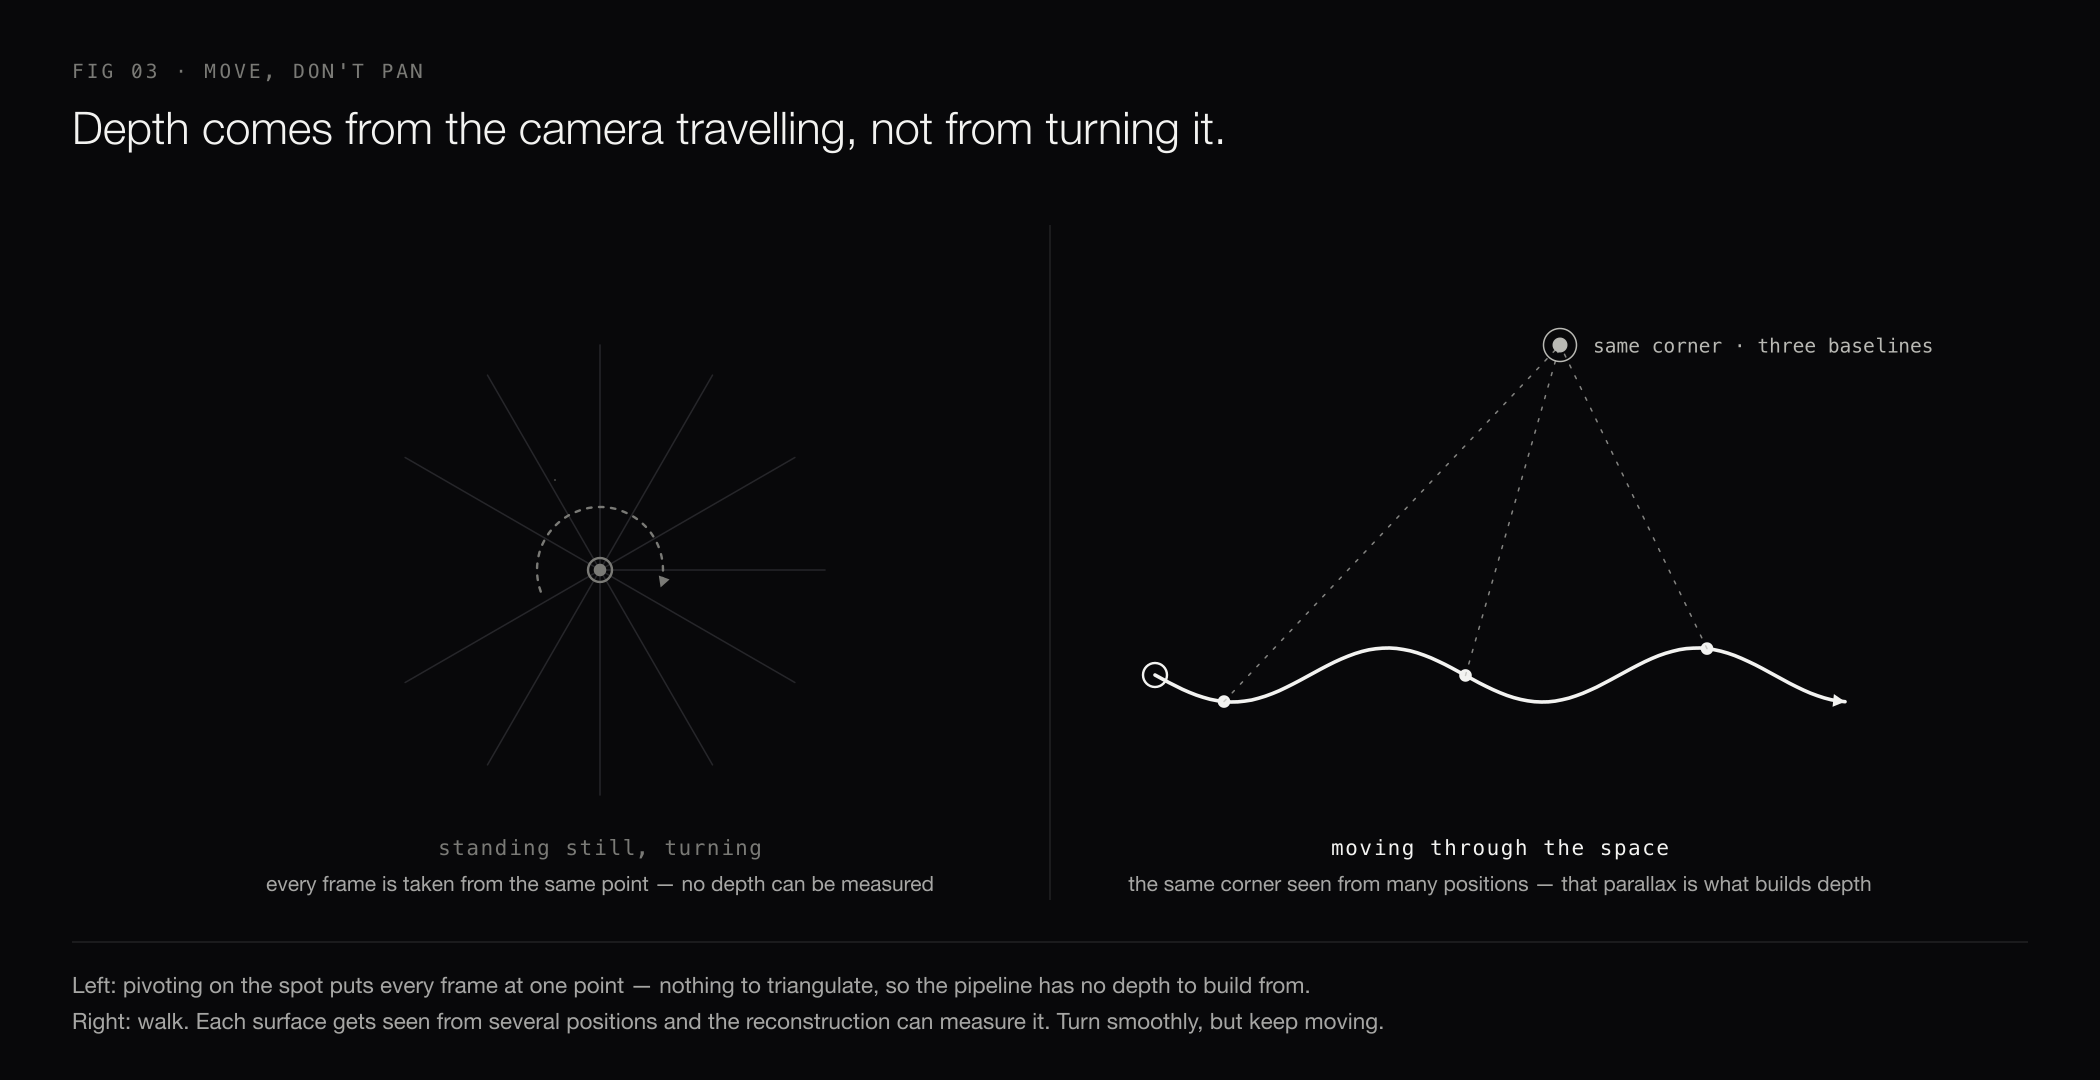
- Keep moving through the space. Depth comes from the camera travelling: the same corner seen from several positions is what lets the reconstruction measure it. Standing in one spot and turning gives it nothing to build from.
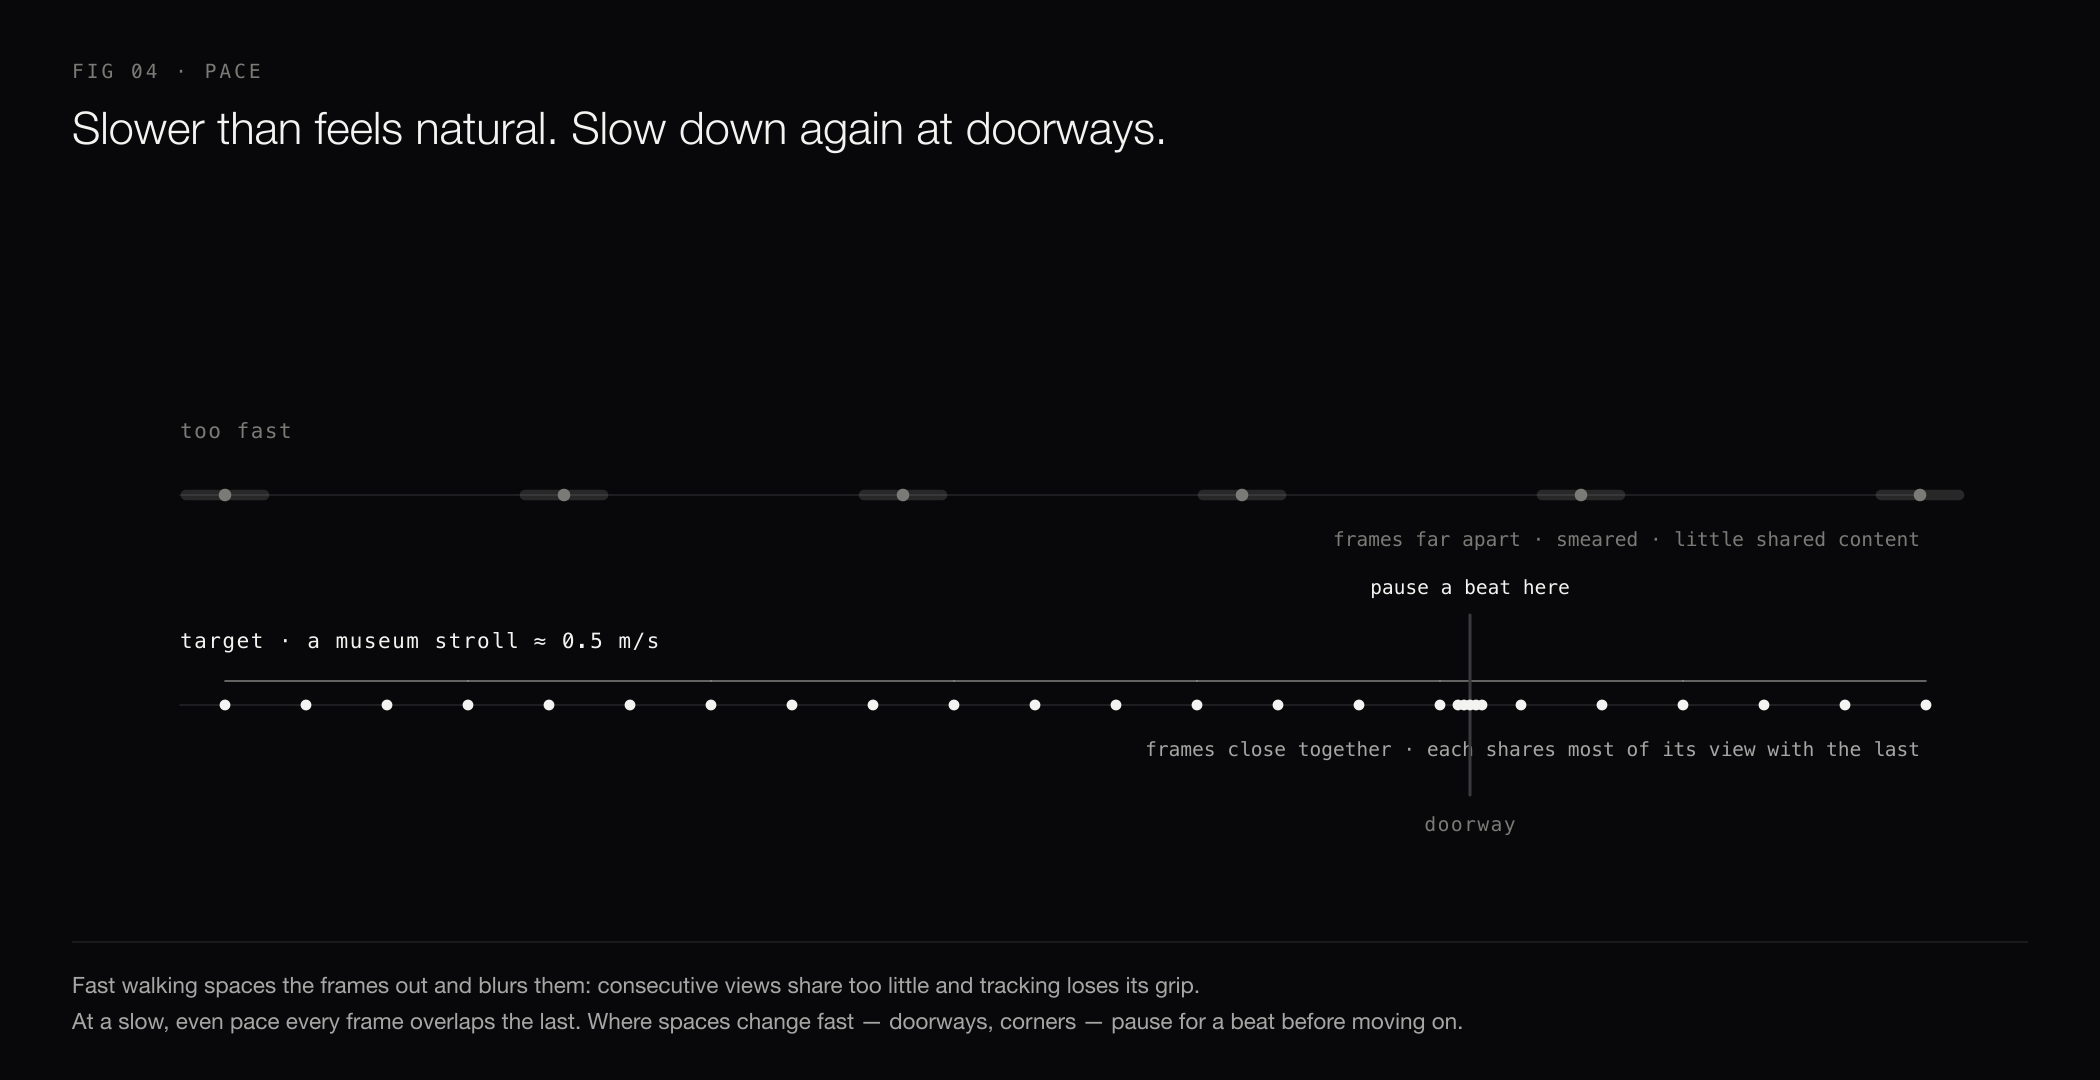
- Walk at a slow, even pace — slower than feels natural, about a museum stroll. Fast walking spaces the frames out and blurs them, so consecutive views share too little and tracking loses its grip.
- Turn smoothly, not sharply. Whip pans are hard to track.
- Pause for a beat at doorways and corners before moving into the next room. Where the space changes fast is where tracking works hardest.
- Hold the camera level and at a constant height. Avoid swinging it, pointing it at the floor, or raising and lowering it as you walk.
Cover the space
- Film one continuous take per video. Every area you walk becomes part of the tour; anything you skip won't exist in it.
- Walk through each room rather than filming it from the doorway — the reconstruction is built from where the camera actually traveled.
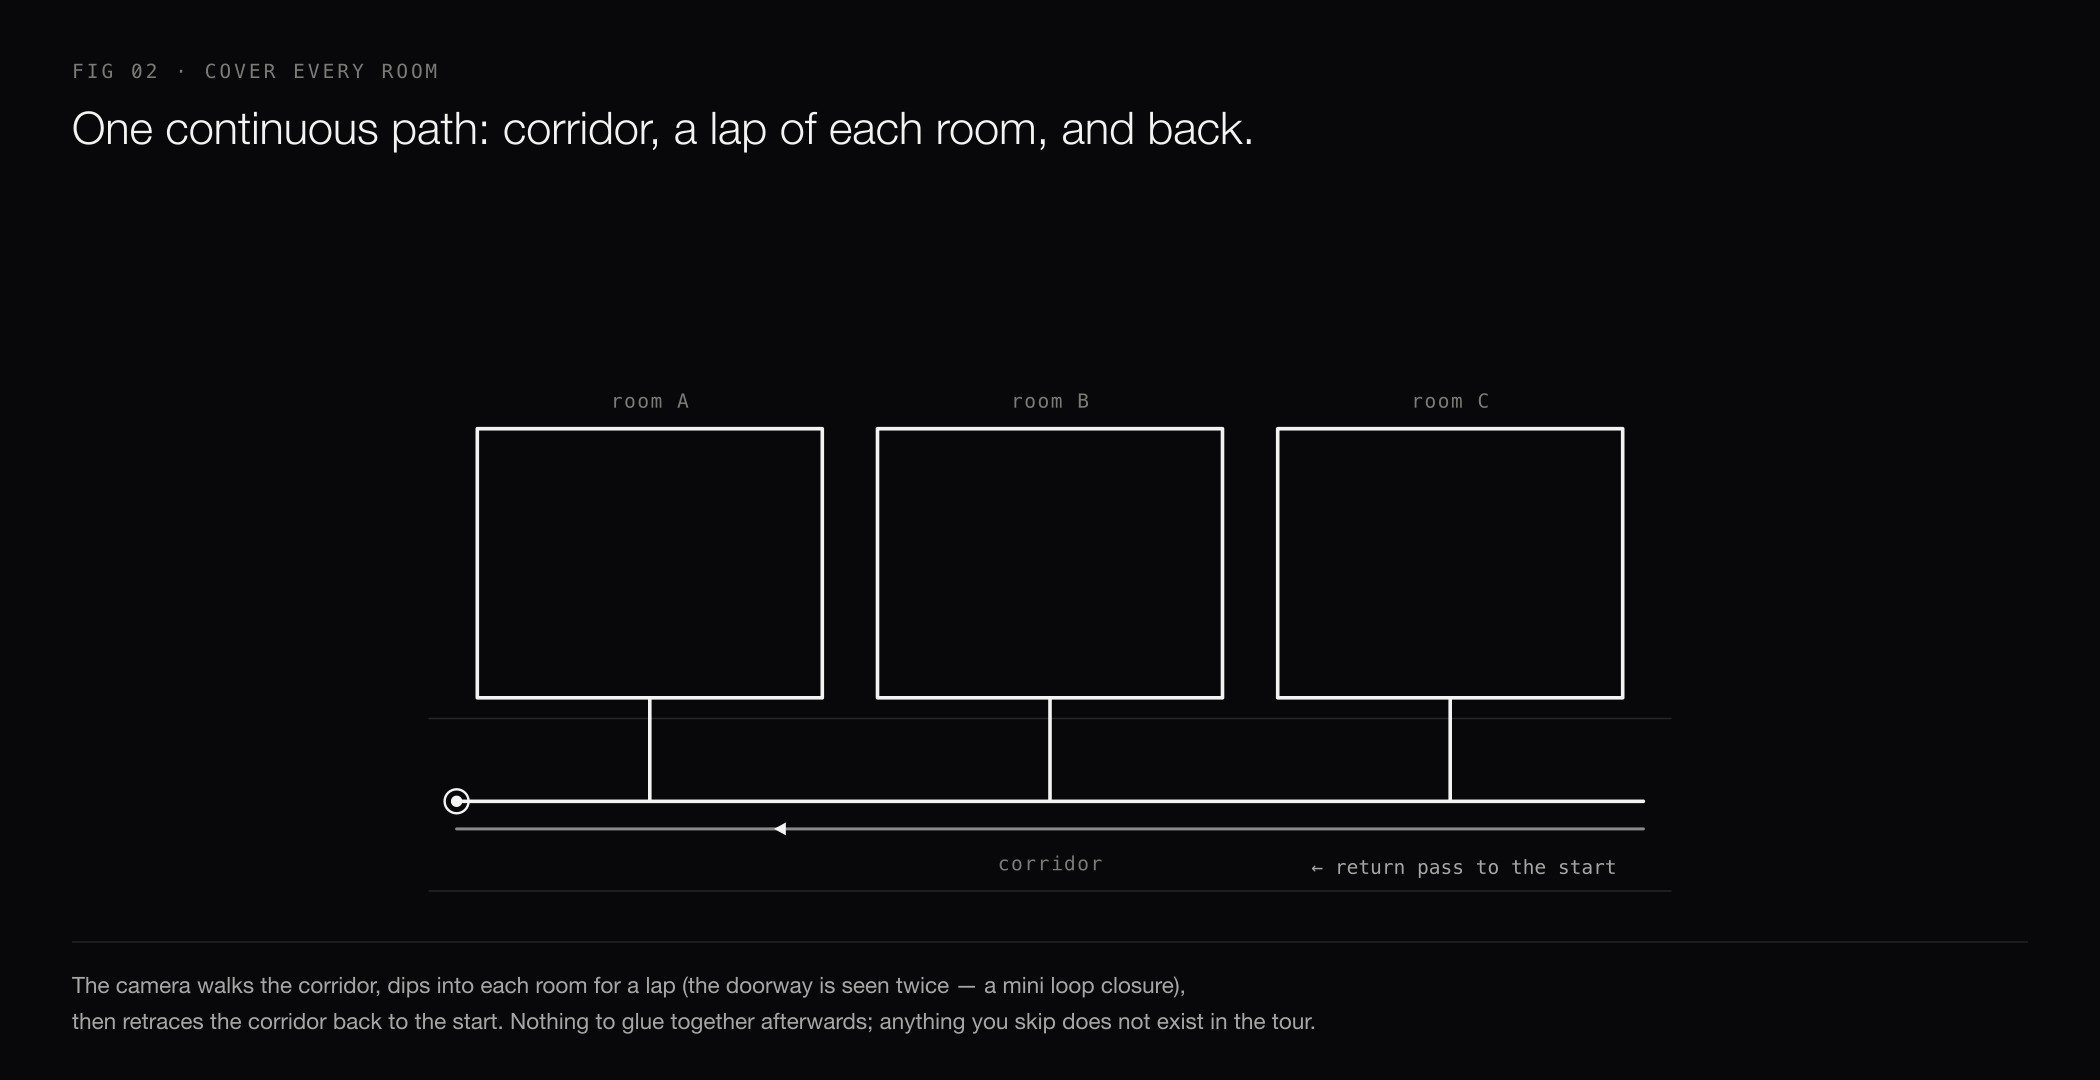
- A good pattern for a floor: walk the corridor, dip into each room for a lap, and come back out the same door. Passing a doorway twice is a mini loop closure. Then retrace the corridor back to your start.
- Keep each video under 10 minutes. For larger buildings, film one video per level or wing and upload each as its own tour on the matching level.
Lighting
- Turn the lights on, even in daylight. Even, consistent lighting maps best.
- Avoid pointing the camera straight into bright windows or the sun — walk so the strong light is off to the side, not filling the frame, or heavy backlight will wash out the detail the mapping needs.
- Very dark areas (unlit basements, mechanical rooms) may reconstruct poorly. Bring temporary lighting if those spaces matter.
Glass, mirrors, and shiny surfaces
Glass and mirrors are everywhere — you can't avoid them, so film them the right way instead of trying to skip them.
How to handle glass and mirrors
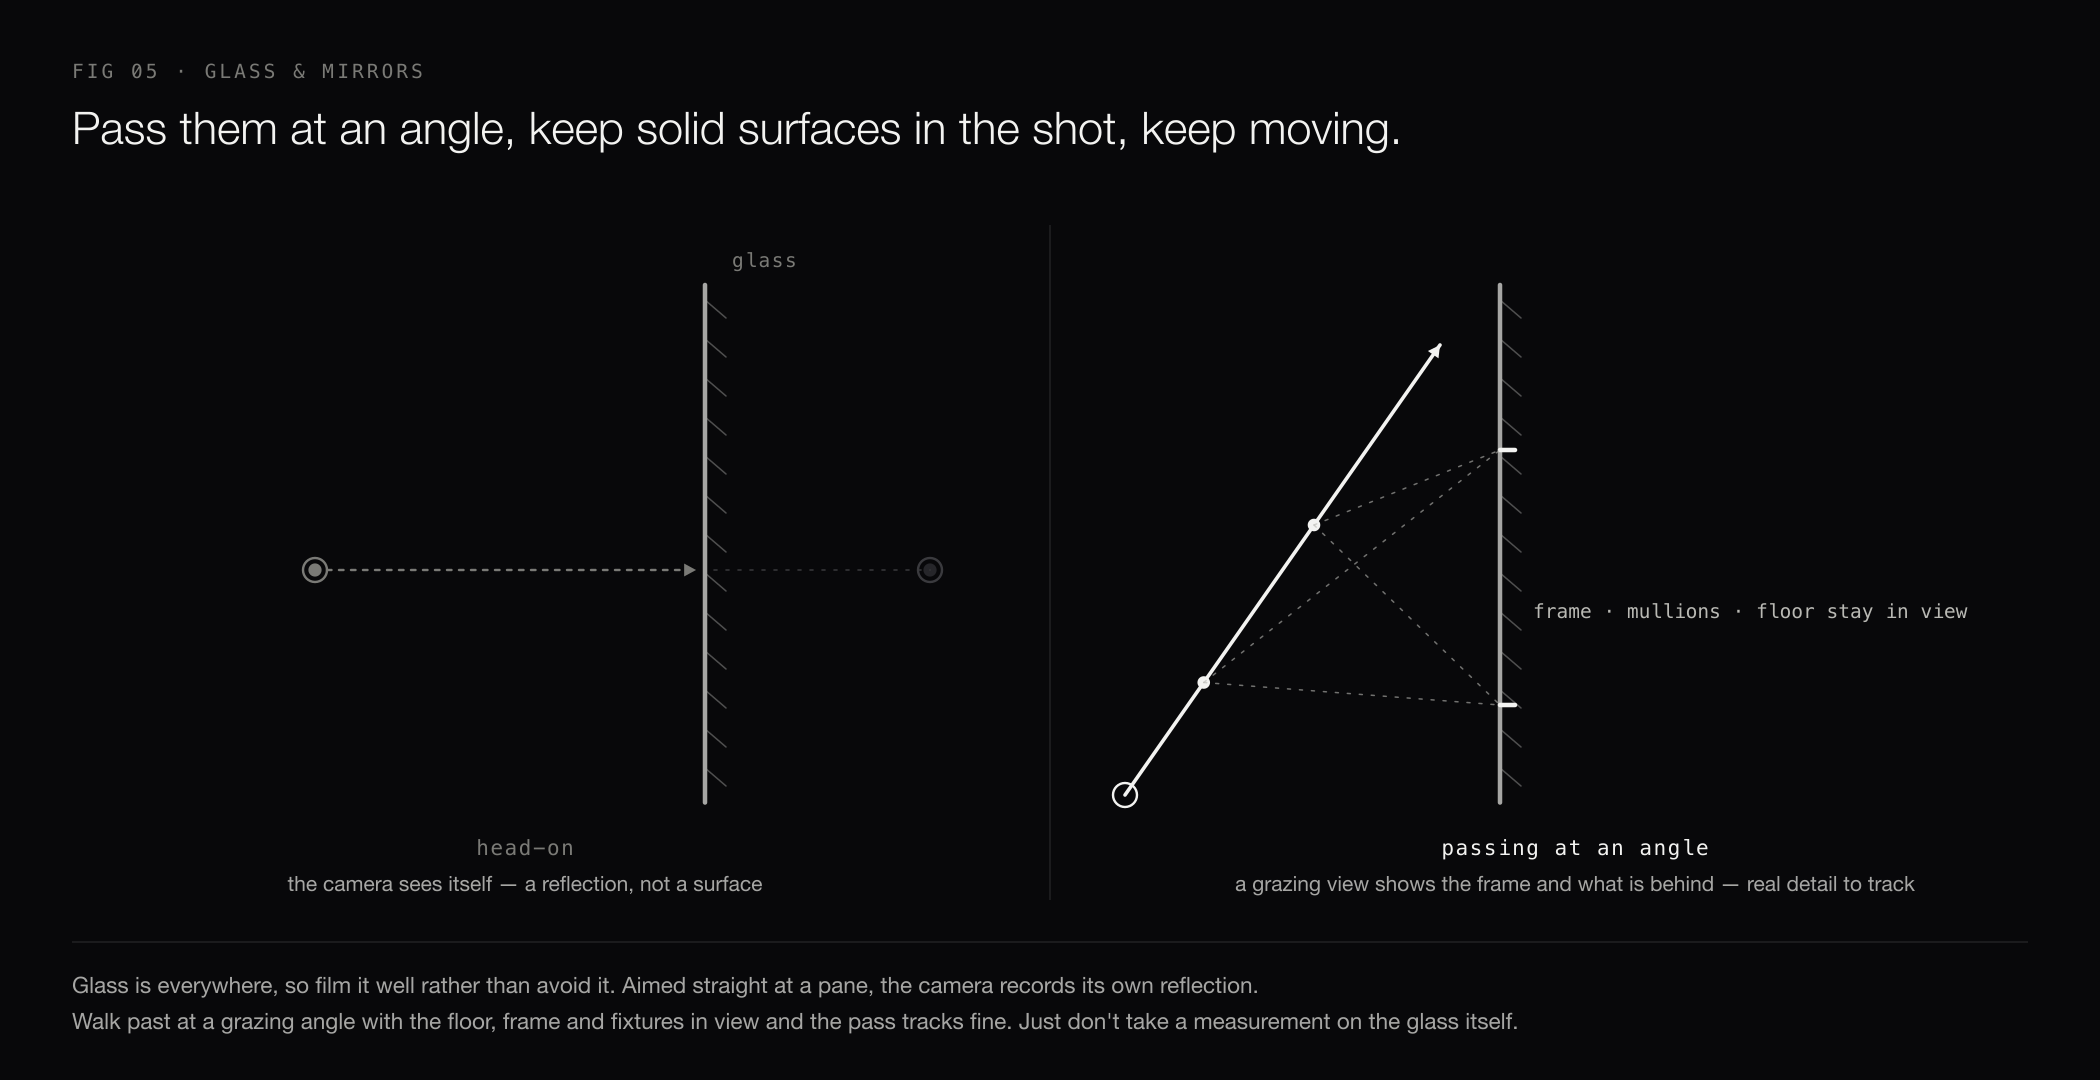
Pass them at an angle, not head-on. Aimed straight at a pane, the camera records its own reflection. A grazing angle shows the frame, the mullions, and what's behind the glass — real detail the mapping can use. Keep solid, textured surfaces in the shot (floor, ceiling, frames, fixtures) and keep moving steadily so no single reflection fills the frame. A measurement taken directly on glass or a mirror won't be reliable — it reconstructs the reflection, not the surface — but the walkthrough itself passes through fine.
Long stretches of blank, featureless wall are hard to track for the same reason — nothing to lock onto. Just move slower past them and keep some textured surfaces (floor, ceiling, fixtures) in view.
Pre-flight checklist
- Lenses clean, battery full, resolution maxed
- Camera on a pole, above head height, level
- Exporting the stitched 360° (equirectangular), best stitch quality
- Lights on throughout the route
- Route planned: one continuous walk, every room, corridor retraced, ends where it started, under 10 minutes
- Slow, steady pace; keep moving; smooth turns; brief pause at each doorway
- Glass and mirrors filmed at an angle, with floor and frames kept in view
When the footage is ready, see Create a Virtual Tour from a 360° Video for the upload flow.