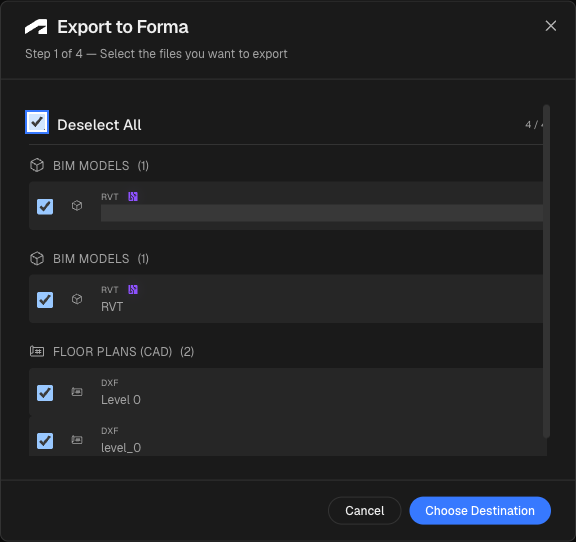
Export to ACC is available from the toolbar on every viewer tab. Clicking it checks whether you have an active Autodesk session — if not, it opens the Autodesk authorization flow and returns you to the modal automatically once you've signed in. If your session has expired, the same re-authorization step runs before the upload begins.
From the export modal, the flow has three steps:
- Select assets — choose from any exportable files attached to the location: Revit (.rvt), AutoCAD (.dwg, .dxf), and IFC (.ifc). Files are grouped by type so you can grab everything in one format or mix as needed.
- Choose a destination — browse your ACC hubs, then projects, then folders, using the same folder tree structure you see inside ACC. Navigate as deep as you need before confirming.
- Upload — per-file progress is shown as each file transfers. If a file already exists in the chosen folder, a new version is created automatically — no per-file prompt required.
A few things worth knowing: the export button appears as an icon only on smaller screens to keep the toolbar uncluttered. The Autodesk authorization is a standard OAuth connection — IPX requests only the permissions needed to browse your projects and upload files; it does not read or modify anything else in your ACC account. Once authorized, your session persists across visits until it expires, at which point you'll be prompted to re-authorize before the next export.
This is available now for any location that has .rvt, .dwg, .dxf, or .ifc files attached.