What's in the tab
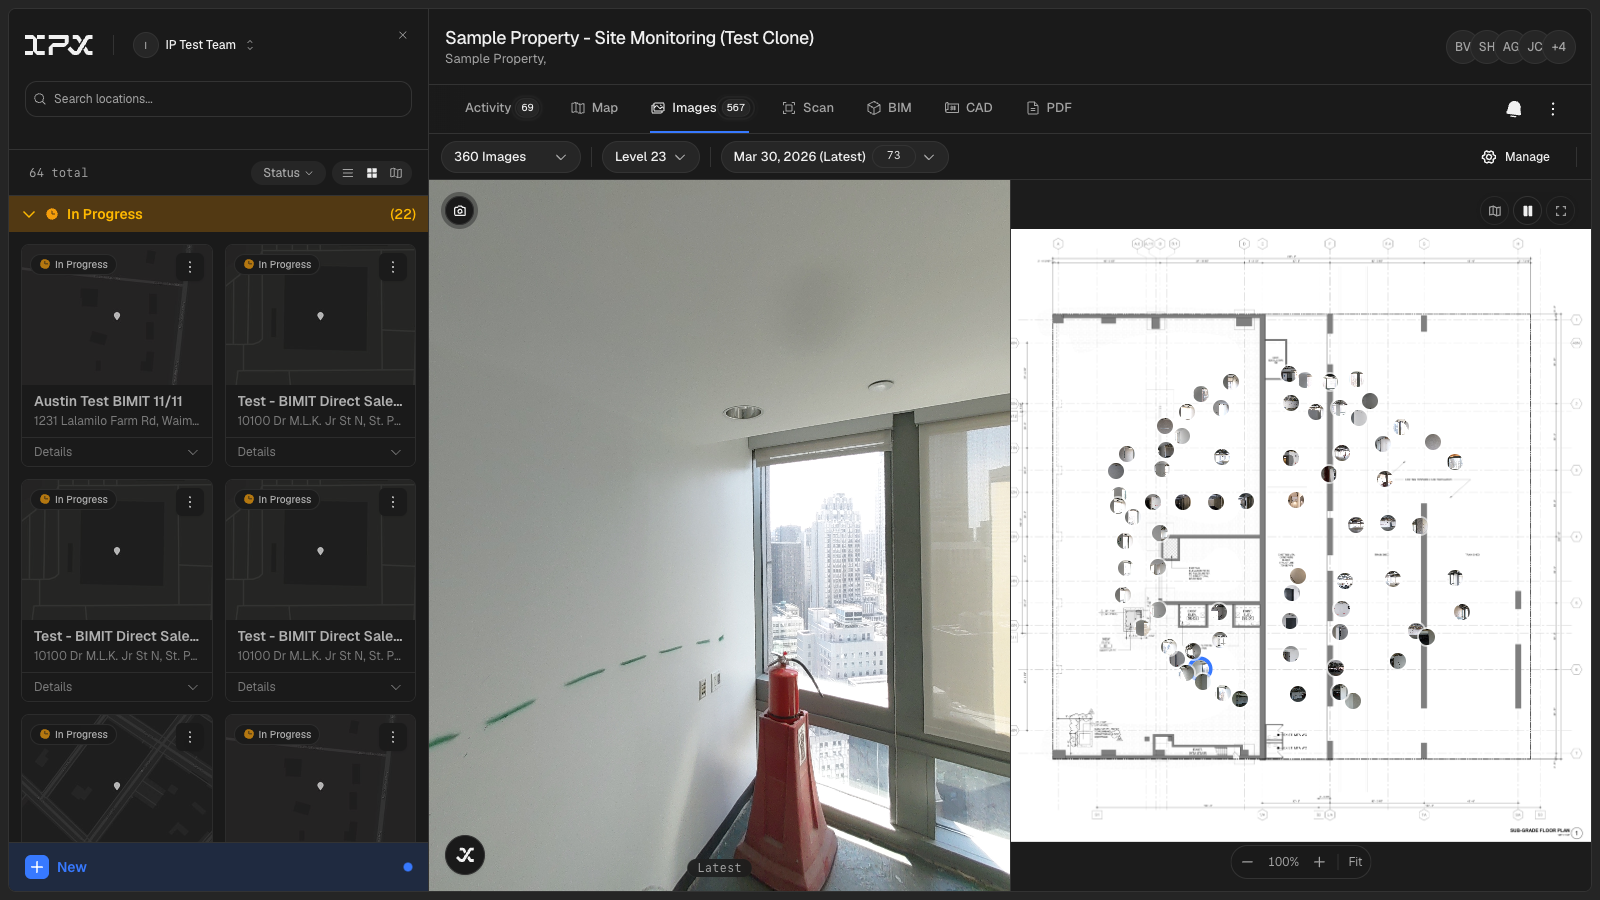
Open any location that has site monitoring data and you'll see a Site Monitoring tab alongside the existing viewer tabs. The tab loads a floor plan for the selected level, with interactive point markers placed at the exact positions where 360° captures were taken. Click any marker to open the panorama in a side panel. Full-screen mode is available for closer inspection.
At the top of the view, a toolbar gives you three cascading controls: Level, Date, and Compare date. Selecting a level populates the date list for that level. Selecting a date loads the corresponding floor plan and markers. Selecting a compare date activates side-by-side mode.
Date comparison
When you choose a second date from the Compare date dropdown, the viewer switches to a split layout — two synchronized panoramas side by side, one for each date. Point markers on the floor plan update their color to show which captures exist on each date: both dates, the primary date only, the comparison date only, or neither. This makes it straightforward to verify which areas were captured in each visit and where gaps remain. Clearing the compare date returns to the single-viewer layout.
Your selected level, date, floor, point, and comparison date all persist in the page URL, so you can bookmark a specific view or share a direct link to a particular capture without anyone having to navigate to it manually.
Managing floor plans and images
If you have admin access to a location, a manage modal gives you tools to build out the data behind the tab. There are three sections:
- Floor Plans — upload a PDF and the pages are extracted automatically. Each page can be labeled and assigned to a level. An AI-assisted level detection step can suggest level assignments based on the floor plan content, which you can accept or override.
- Capture Dates — view and manage the scan sessions associated with a location, including their recorded scan dates.
- Images — upload an entire folder of captures at once. The system parses the folder structure to identify level and date from the file paths, generates thumbnails, and groups images into the right capture dates. From there, an assignment panel lets you click images to assign them to specific point markers on the floor plan. Assigned markers update immediately to show a thumbnail preview.
Image library
A tree view in the tab organizes all uploaded images by level and date. Thumbnails are shown in a grid. The assignment panel in this view lets you move images between points, with changes reflected on the floor plan markers right away.