Platform
Cut into a scan with the new section box tool
You can now cut into a scan to see what's inside it, right from the Scan tab.
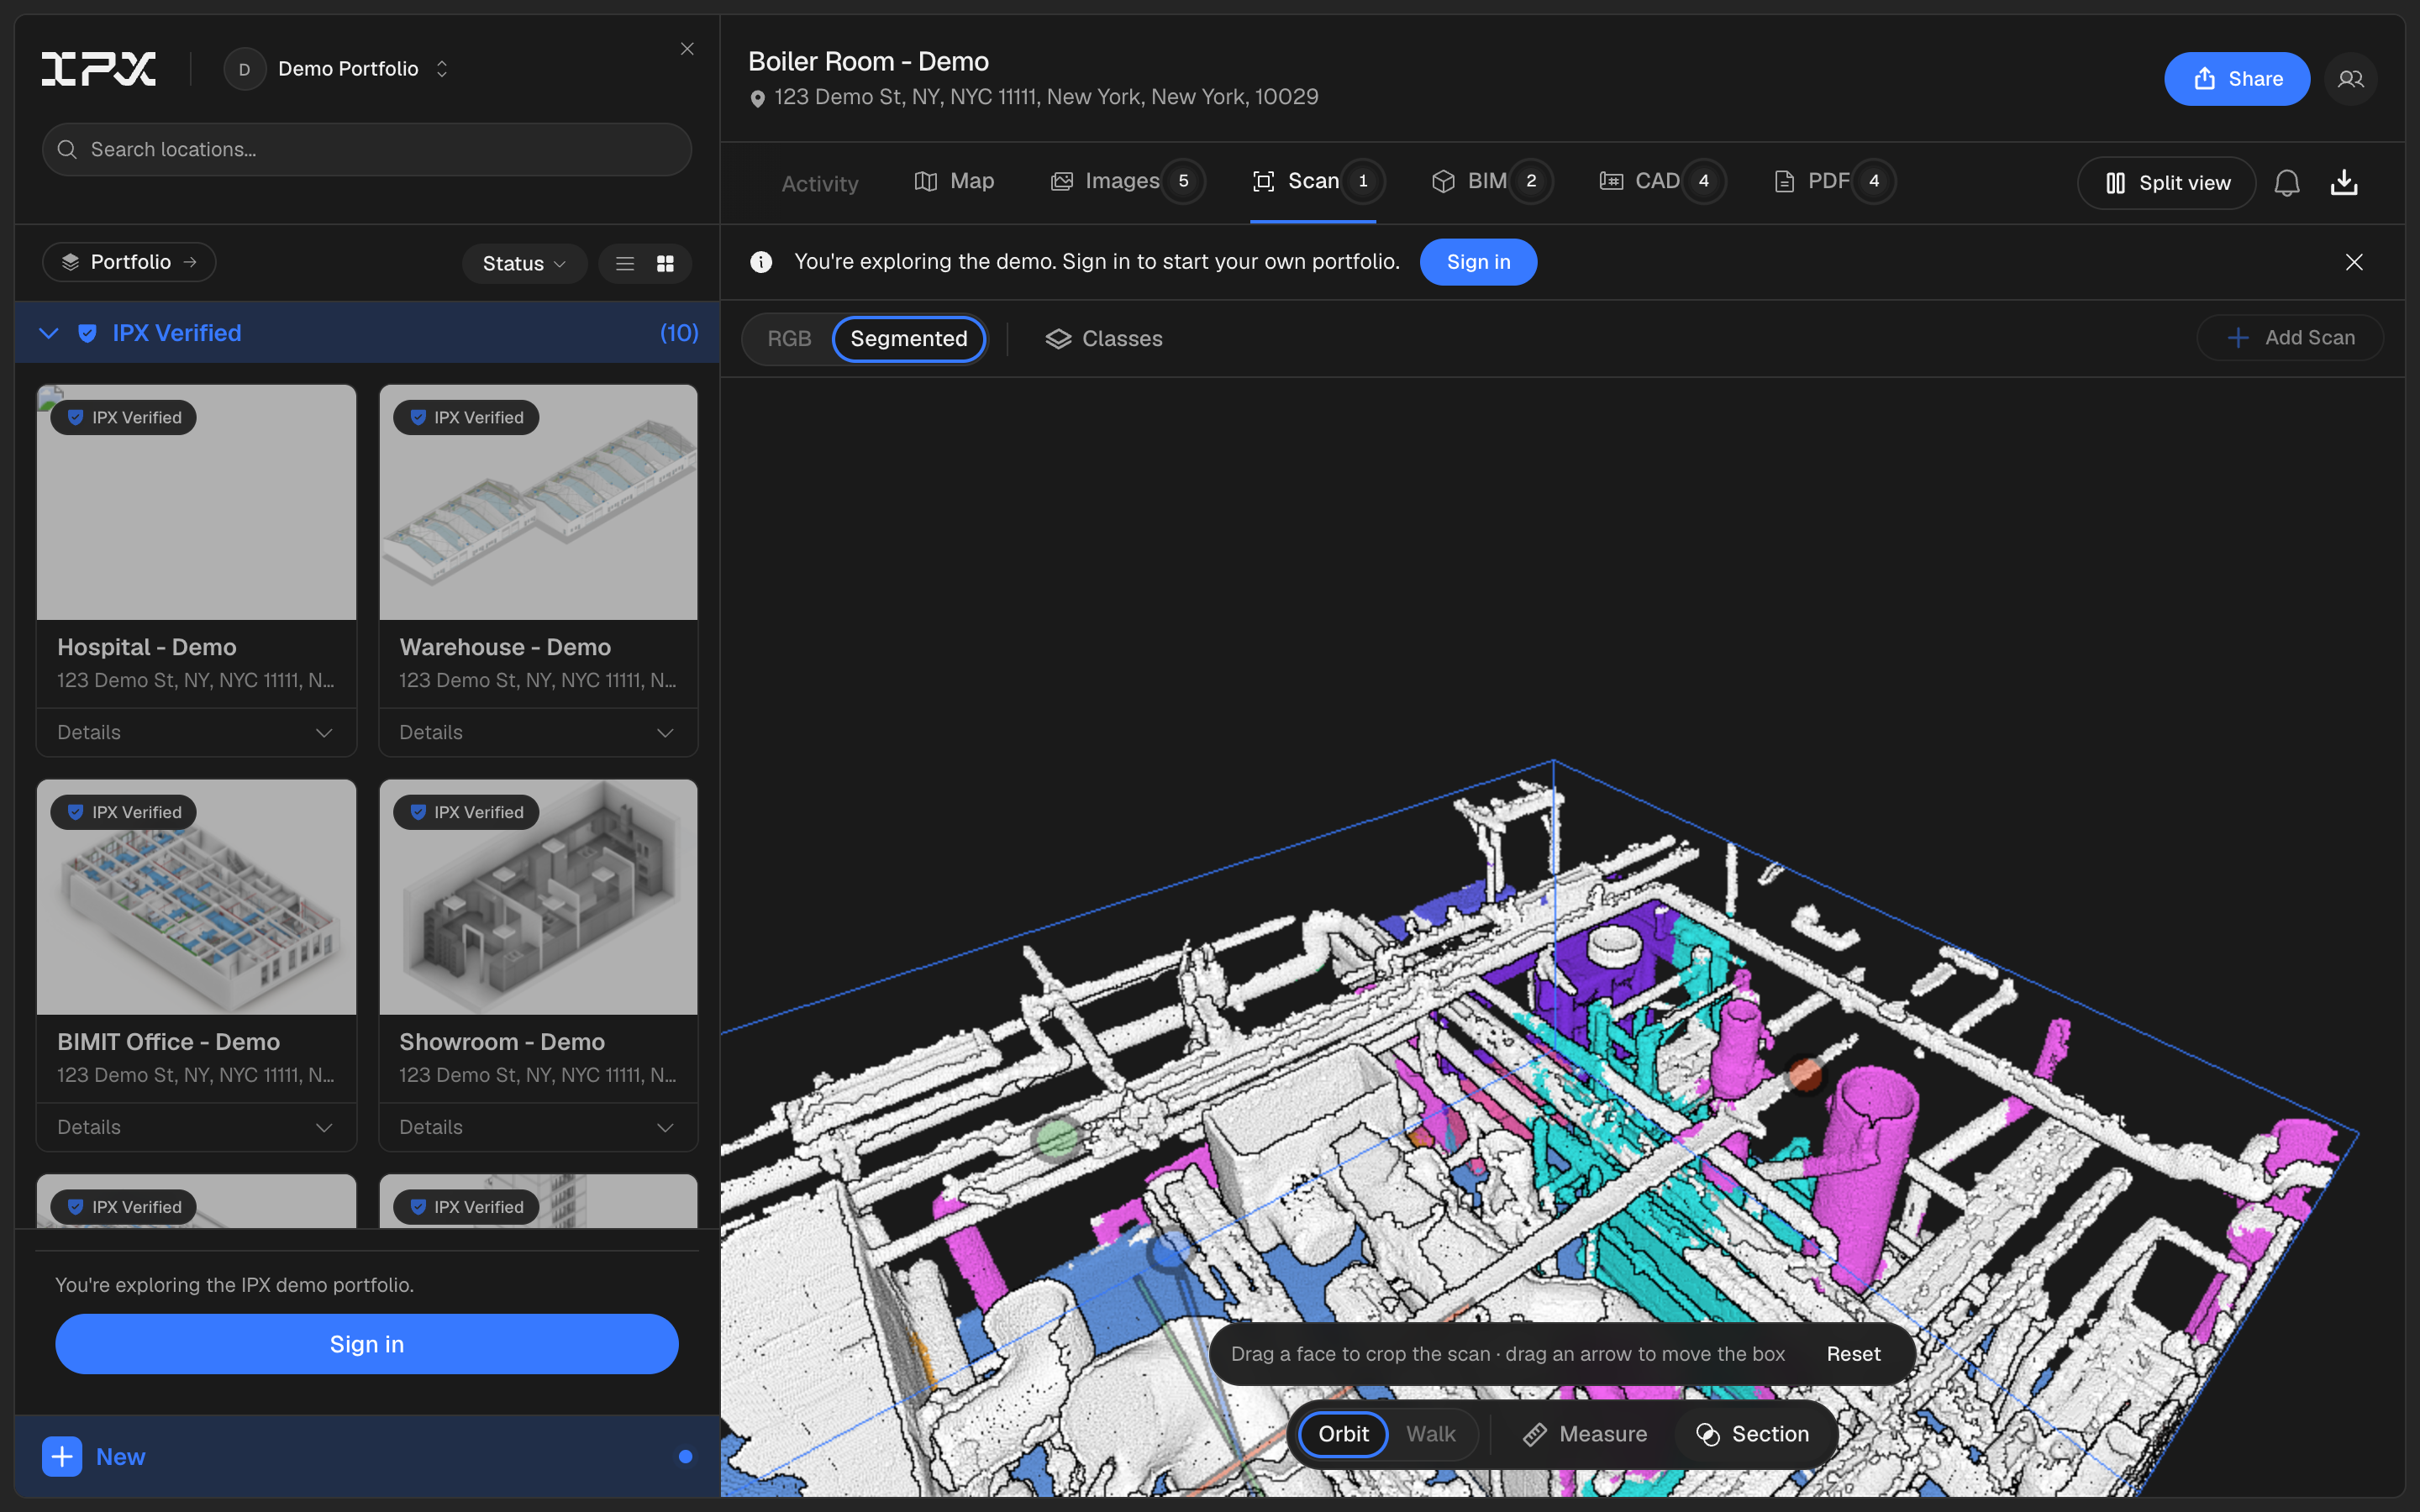

You can now cut into a scan to see what's inside it, right from the Scan tab.
The problem
A point cloud is a solid-looking mass from the outside. Until now there was no way to look through walls, floors, or ceilings in the Scan tab to check what's behind them. You had to eyeball the outside of the scan and guess, or wait for a BIM model to check anything internal.
How it works
A new Section toggle sits next to Measure in the Scan tab toolbar. Turn it on and a box appears around the scan with a transformation gizmo: six face handles let you push or pull one face at a time while the opposite face stays put, and three axis arrows slide the whole box. Everything outside the box disappears, so you're looking straight into the point cloud.
The box fits the cloud's real extent, not just its bounding shape, so it starts snug around what's actually there. A Reset button in the hint strip above the toolbar refits the box to the whole scan at any time. Clicking empty space or pressing Delete won't lose your box - it stays selected and ready to adjust.
The section state is part of the URL, so a shared link opens with the same cut already in place for whoever you send it to.
Alongside this, we fixed a crash that could happen after opening the BIM tab and then the Scan tab: placing a measurement would sometimes fail because the scan and BIM viewers were fighting over which 3D library to use. That's resolved, so switching tabs and measuring now works every time.
Getting started
Open the Scan tab on any scan, click Section in the toolbar, and drag the handles to cut into the cloud. Click Reset to snap back to the full scan, or turn Section off to remove the cut entirely.
Good to know
Measurements you place inside the section box land on the points you can actually see, not on points hidden behind the cut.